Showing posts with label Tandem Island. Show all posts

Thursday, November 1, 2012

Chesapeake Bay Magazine Article

Looks like I made the Chesapeake Bay Magazine article on Lynnhaven.


http://www.chesapeakeboating.net/Publications/Chesapeake-Bay-Magazine/1999/Chesapeake-Bay-Destinations/Lynnhaven-River.aspx


Sunday, August 26, 2012

Photo Shoot on the Lynnhaven


Local photographer, Steve Earley asked Chris and me to take some picture on the Lynnhaven River for a magazine article that he is doing. Steve has a very nice Blog of his own, "The Log of Spartina" The morning started very early to catch the colors of the dawn. I brought my Tandem Island and my wife, Ruth. The weather was great and we all had fun. I have not seen the results...


Tuesday, May 22, 2012

Back Bay Nor'easter


This weekend the winds were blowing much too strong from the North East. The Chesapeake waves were 4-6 feet. We decided to seek the more sheltered Back Bay, on the border of Virginia and North Carolina. This area has different challenges: shallow, choked with oriental invasive weed, with plenty of poisonous Water Mocassins.


Thursday, November 3, 2011

AI Bulkhead


This is a picture of my Adventure Island foam bulkhead. You will notice that the rudder cable turning blocks are missing. I moved them further back to make the bulkhead 100% water tight. I used Goop Plumbing Glue to seal any gaps.

Saturday, October 29, 2011

Mattoponi and York Rivers

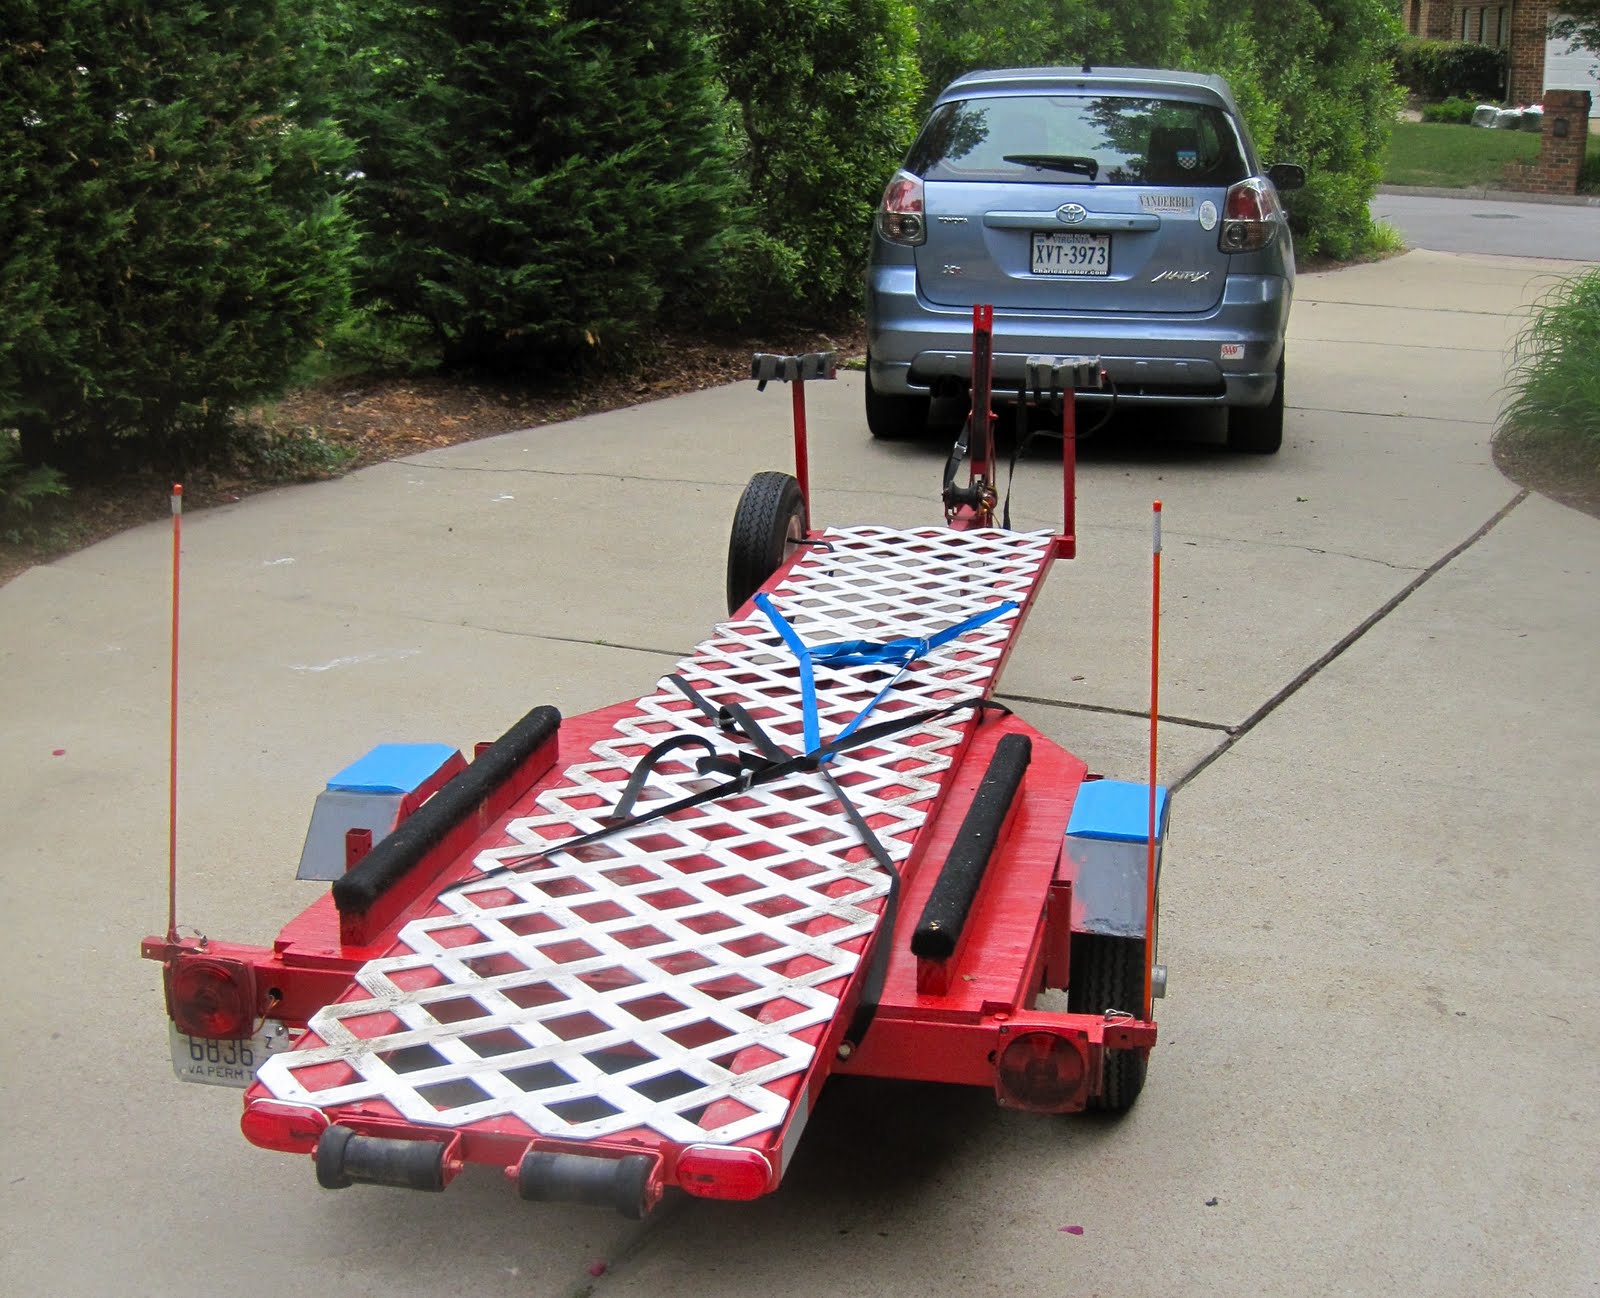
I have been thinking about doing another Fall River Trip.

Last year I did the James River from Richmond, Virginia to Portsmouth. A two night, approximately hundred mile trip.
http://www.youtube.com/user/dogslife23452#p/u/28/f0GGzPtA3CU


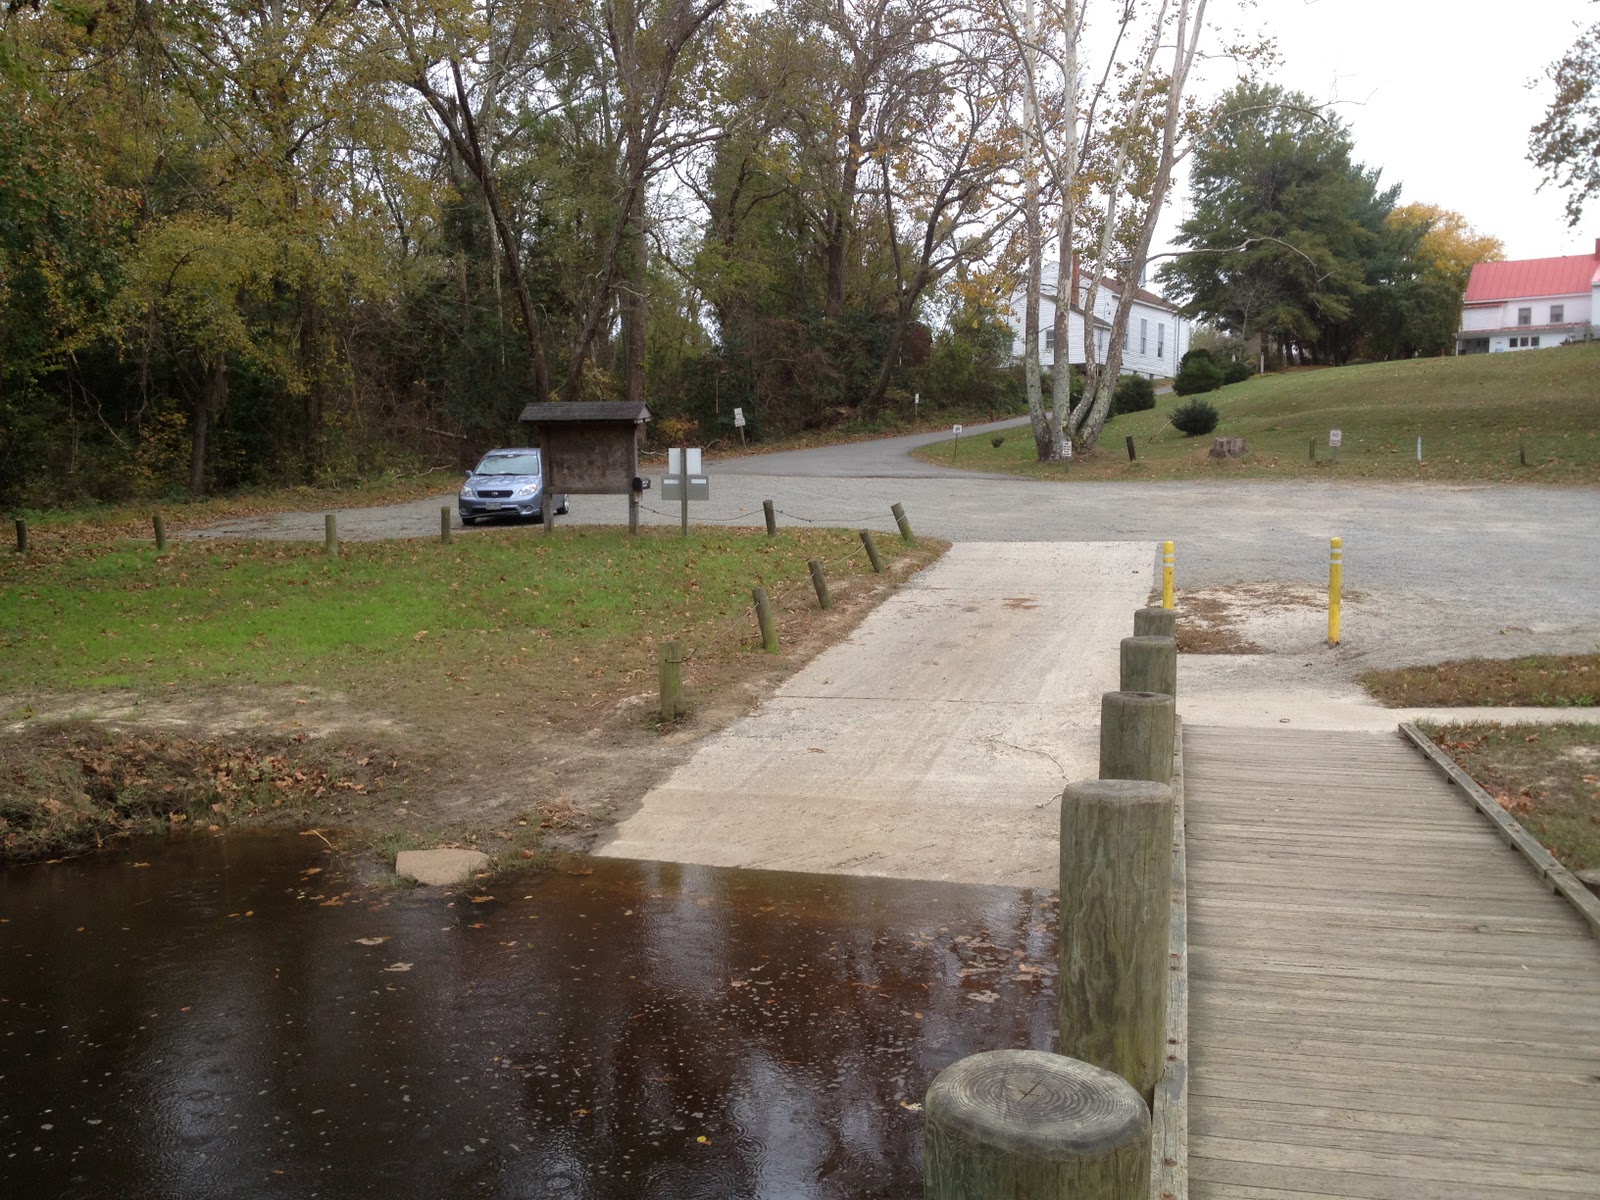
This year I am moving to the next major river on the Chesapeake watershed. The York river and it's tributary the Mattoponi River are very much different than the James.  The Mattoponi is considered one of the most pristine Rivers in the Mid-Atlantic Region. There is no industry until your reach the York at West Point. We will start at the upper tidal reaches at the Aylett public boat ramp. At this point the river is narrow with overhanging trees. We will either have to keep the Adventure Island mast down or hug the center of the channel.


The tidal range on this river can be up to four feet. This is some of the highest tides on the Chesapeake. When coming in it can run a couple of knots against you.  After Walkerton Bridge eight miles down, the river  opens up slightly. The tree lined banks fall back and open up to mashes. The Fall is a ideal time to view flocks of migrating birds.


At West Point, 32 nautical miles down, the Mattoponi merges with the Pamunkey river to form the wide York River. The south side of the York has high banks and bluffs. At low tide the shore line can be hard to approach due to the 1-2 foot water depth. After the York River State Park you can not land due to a number of Military Camps and Reservations.


On the other hand, the North side of the York River has large marshes. There are some Oyster beds shown on the nautical charts. The main channel does run closer and there may be a few small places to take out for a night camp. Google Earth is a great tool. But, it can be a little deceiving. Areas that look like sandy beaches can be under water at high tide. I might take a day trip and put in at the state park boat ramp to scope out this part of the river. Hugging the North bank is not only the most direct route but also the safest to keep you out of restricted areas.


The York River enters the Chesapeake 58 nM into the trip. To head South you can cut behind Goodwin Island trough the Thorofare. It is another 10 miles across the Poquoson Flats, along the Plum Tree National Wildlife Refuge to Grand View Island. To Hampton the total trip is about 74 nM. Cutting across the Chesapeake from Grandview to the Lynnhaven makes the trip about 86 nm.

My schedule is pretty tight. Trying to coordinate this trip with others might put me close to Thanksgiving. By that time much of the leaves will be gone and the weather will be cold, well into the 30's at night.

Friday, October 7, 2011

2011 North Carolina Challenge


Last week I participated in the Watertribe North Carolina Challenge held on Cedar Island. I had my AI and there were three TI's in the race. Overall the Hobie Islands did very well and came in Second and Third. This is Part 1 of my Video:


I had several equipment failures:

1) Mirage drive was not fully latched on one side. When I applied pressure that side popped out and the latch closed it self below not allowing the drive to drop back in. Because of the angle the other side release hit the hex bolt and will not allow that side to be released. I was stuck up the creek without a paddle. To release you need to remove the two very small plastic screws on the handle so that the lever can clear the bolt.

2) The mast would jump out of the mast receiver ~2" when close hauled. I had to luff up to reseat the mast under the latch. This became harder as the race went on. After the race I noticed that two of the four screws holding the metal plate inside the receiver tube had fallen out and the other bolts were backing out. Also the latch screws were very loose allowing the latch to pivot. This prevented the mast from seating fully down and properly engaging in the locked position.


My Hobie dealer is slightly at a loss. Any repair recommendations are appreciated. The mast plate will be the hardest to correct. Locktite might not be the answer since I believe Hobie uses that in the installation...

Sunday, August 7, 2011

Watertribe North Carolina Challenge

This past May I did a practice run with my son for the Watertribe North Carolina Challenge. This year the race will be held on September 30th. It starts and ends on Cedar Island, North Carolina. If you like a little Adventure, this is the race for you. There is plenty of time to accomplish this course. The people that you meet and the food that you eat can't be beat.


This race is for all types of small boats like kayaks, sail and multihulls. Register now and you will not regret your decision.


Monday, June 13, 2011

Tired Of Sitting in Water

My new Hobie Adventure Island tends to scoop up water through the lifting handles when  healed over. The water collects in the seat well. Also the drain plugs leak. The plug threads are incomplete and the "O"  ring might not seat well.

 I am 6' 2" and the seat back sits low on my back. To solve the drain and support problems I decided to raise the seat. Since there are no plug holes I had to drill through the back of the seat well.

To add some support to the lower back rest I added a polyethelene pad. This might be a little overkill.

  To raise the bottom two 1.5" foam pads under the seat.


Monday, May 30, 2011

My Hobie Trailer

 I have had some question about my Hobie Trailer. I bought the trailer several years ago at Harbour Freight to carry several conventional kayaks.  Originally I decked over the frame, and added framework to carry three kayaks. When I bought the TI the boat was much longer so I had to move the forward post as far forward as it would go.

 To make the main bunk I used things around my garage. I bolted angle iron frame to the top of the trailed deck. Two 2x4 PT board are laid on each side, slightly angled down. Polyethylene Lattice is screwed into to the wood with a slight dip in the middle. The with of the bunk is based on the with of the Lattice, 2 Foot.

 The two forward posts are bow supports from the original design. I can carry my new AI on top of the TI by mounting a rear support frame. This supports the AI without putting any load on the TI. Below picture shows the two boats loaded.

Friday, May 13, 2011

Installing Kayaking Bob Spray Skirt on Hobie TI

To keep the spray down I installed a mesh spray skirt on each side of the bow. I purchased it from Kayaking Bob. The spray skirt comes without any installation accessories. The web site has different recommendation on how this can be installed. I decided to use what I had in my garage instead of going out and purchasing additional material.

List of Materials:
     Parachute Cord
     4 Plastic Eyes
     4 Plastic Hooks
     2 Fiberglass rods from a reflective road marker
     Heatshrink Tubing

I threaded the sprayskirt with the parachute cord leaving ~ 4" loop at each corner. ~ 2" Heatshrink was slid over one end and then both ends were tied with a square knot. The Heatshrink was slid over the knot and shrunk to keep the knot from coming apart. The knot was slid into the AFT short section of the skirt to hide the knot.

Two plastic eyes were screwed on to the bow. The bow loop of the skit was passed through the eye (inside-out) and the entire skirt was passed through the loop. The position of the skirt was adjusted and parachute cord was sewn to the skirt to maintain the distance. 

 The AFT corner is attached with a combination of hook and loop. Make sure the center loop position is slightly forward of the ama crossarm. The tension keeps the loop from coming out.

 The center corner is pulled out using a piece of parachute cord. Make a small loop in the end. Loop it through the center. Run the line out to the bungee peg, back to the start loop and make a sliding knot on the return string. This will allow the tension to be adjusted as the lines streches. The double wrap acts like a Spanish Tacle reducing the load on the sliding knot.

 The inside edge tends to pull away from the hull. To keep it close a fiberglass rod is inserted into the inside edge of the skirt. I did not want to use use the hatch bungee as recommended on some sites to pull in the skirt. A short Bungee and a plastic hook is used. I have a welded hook but another reverse plastic hook could be used. The two hooks pull against each other.

To stowe the spray skirt disconnect the center loop. Roll skirt into it self and tuck under the hatch bungee.

I will be going on to the bay this weekend to test the rig.